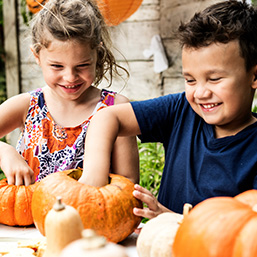
You know the fun doesn’t end just because summer is over. If your kids are curious, like to get dirty, and enjoy the magic of science, we have ten great seasonal science experiments for you to try with your kids.
1. Where does the water go? Before the leaves change colors and start to fall, grab a few green leaves directly off the tree. Place the stems of the leaves in a mixture of water and red food coloring. You can see how the leaf absorbs the water as the color moves through the leaf. Photograph and document the progress over the next 24 hours.
2. Candy corn lava lamp. Pour 1 cup of water into a large mason jar. Add orange food coloring and mix. Slowly pour in 3 cups of vegetable oil and let the mixture settle for 20 minutes. Then, add an effervescent tablet into the mixture and watch the colored bubbles move around like a lava lamp.
3. Apple volcanoes. If you are looking for ways to use up the bad apples this fall, why not make a volcano? Cut out the center of a whole apple and fill with 1 ½ tbsp of baking soda and a few drops of red food coloring. Place the apple in a bowl to catch the “lava”. Slowly pour vinegar into the centre of the apple and watch it erupt.
4. Seed bombs. Gather newsprint, tear into small pieces, and cover it with water. After it has soaked for 30 minutes, add the mixture to a blender to create a pulp. Mix the pulp with seeds you harvested from your summer flower garden, and squeeze out the excess water. Form the mixture into small balls and let them dry completely. In the spring, drop seed bombs in areas that need a little color and they will plant themselves. They also make great gifts!
5. Pumpkin science. Compare two or more similar-sized pumpkins by weighing, measuring the circumference, comparing the color, the thickness of the shell, and the number and size of the seeds. Before cutting them open, you can also see if they will sink or float by placing them in a bucket of water. Let the kids make predictions before each comparison.
6. Candy corn buildings. Use leftover candy corn (they usually go on sale right after Halloween) and toothpicks to create buildings, towers, bridges, or whatever your engineer desires. You can even ‘bling up’ your creations by adding beads to the toothpicks before adding the candy corn to contain them.
7. No one likes brown apples. There are so many methods for preventing sliced apples from turning brown, but which one works the best? Place a cut apple in each of these solutions: ginger ale, salted water (½ tsp of salt to a cup of water), vitamin C crystals or chewable C vitamins, apple juice, lemon juice, honey water (1 tbsp of honey to a cup of water), and plain water. Compare the results.
8. Make pumpkin gut slime. Create a simple sensory toy with pumpkin guts and seeds, two bottles of clear glue, 1 ½ tsp of baking soda and 2 tbsp of contact solution. Knead it together until it is no longer sticky. Refrigerate when not in use and don’t keep for more than for a few days.
9. Oozing Jack-o’-Lantern. Carve a face into a pumpkin, removing the pieces from its eyes, nose, and mouth. Next, cut a hole in the bottom of the pumpkin, large enough to fit the pumpkin over a disposable cup. Fill the cup with 1 cup of water, a squirt of dish soap, and 3 tbsp of baking soda. Place the pumpkin over the cup. When you are ready, quickly pour ¼ cup of vinegar into the cup, replace the top of the pumpkin, and stand back. The solution will ooze from the pumpkin face. This is definitely an outdoor project!
10. Fire pit color. Soak two pinecones in a mixture of water and 1lb of salt. At the same time, soak two pinecones in water and 1lb of Borax. Take them out after 30 minutes and let them dry completely. When they are dry, place the pinecones into a fire pit and watch the color differences. You will find that the salt burns yellow and the Borax burns green. Stand far away from the flames.
Pam is a writer and mother of three curious kids. Follow her creativity on Etsy at Pam’s Party Printables.
See our related articles:
Calgary’s Child Magazine © 2024 Calgary’s Child